
Warm Cinematic Lightroom Preset DNG 2026 (Free Download)
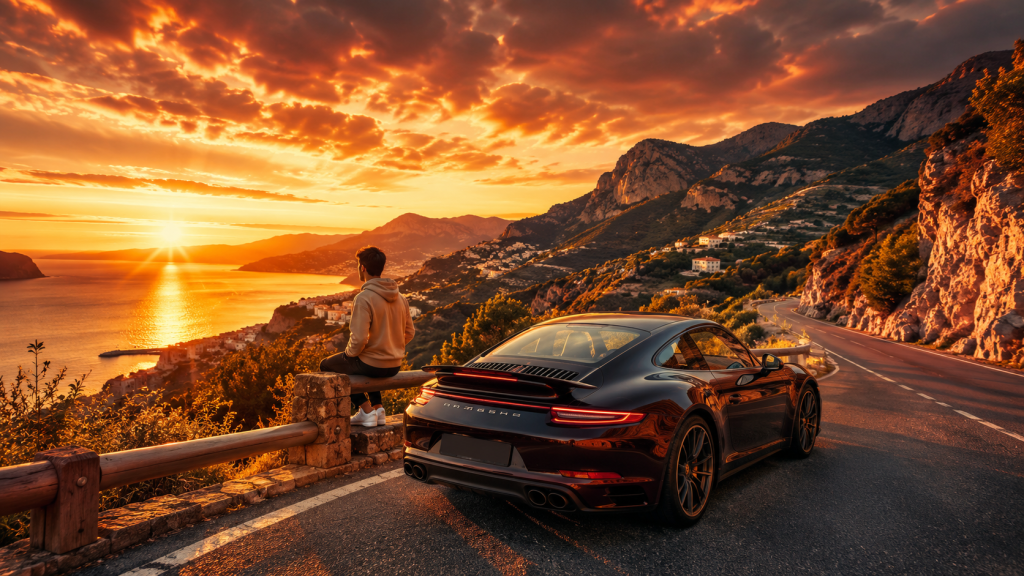
The warm cinematic grade is the most loved colour look on social media, and a free warm cinematic Lightroom preset DNG lets you apply it in one tap. This preset adds golden highlights, soft teal shadows, and a rich film tone that makes any photo feel like a movie still. This guide explains the look, how to install the DNG, and how to use it on photos and reels in 2026.
What Is a Warm Cinematic Grade?
A warm cinematic grade balances golden, warm highlights with cool teal shadows, the same teal and orange contrast used in films. It flatters skin, adds depth, and creates an inviting, premium mood. Unlike a flat filter, this grade shapes the light in the image, which is why it instantly reads as cinematic and professional.
How to Install the DNG Preset
- Install the free Adobe Lightroom app.
- Save the warm cinematic DNG file to your phone.
- Import the DNG into Lightroom as a photo.
- Open it, tap the three dots, and choose Copy Settings.
- Open your own photo and choose Paste Settings.
For a darker, dramatic alternative, see my moody dark Lightroom preset DNG guide, and find more in the free Lightroom presets DNG hub.
When to Use a Warm Cinematic Grade
This grade suits a wide range of content. Use it for golden hour portraits, travel photos, couple and romantic reels, festival edits, and lifestyle content. It pairs beautifully with a Diwali AI photo editing prompt for festive glow, and with the cinematic AI photo editing prompt for a unified film look across your feed.
Adjusting the Preset for Your Photo
A preset is a starting point because every photo is lit differently. After pasting the settings, check the white balance and warm or cool it so whites look neutral. Adjust the exposure so highlights are not blown out. Protect skin tones by easing the orange saturation if faces look too warm. These quick checks turn a generic grade into a custom, natural one that flatters every photo.
Use It on AI Photos and Reels
The warm cinematic preset is perfect for AI portraits. Apply it to images from my AI photo editing prompts to push the film tone further. For video, grade your key frames and cover, or add a matching warm filter in your editor. The grade completes a cinematic reel built with a VN cinematic code or a slow motion CapCut template.
Build Your Own Warm Preset
Once you know the recipe, you can grade by hand. Lift the warm highlights, push the shadows slightly teal, add gentle contrast, and keep skin natural. Save the result as a preset so your whole feed shares one consistent, recognisable warm tone. A unified grade is one of the fastest ways to make a page look curated and professional.
Mistakes to Avoid
Do not over warm the image until skin looks orange. Do not crush the teal shadows so hard that detail disappears. And do not apply the same exposure to every photo, since each image starts at a different brightness and needs a small tweak.
Warm Cinematic for Travel and Lifestyle
This grade is a favourite for travel and lifestyle creators because it makes ordinary scenes feel like film. Golden hour streets, beach sunsets, cafe moments, and city walks all gain a rich, inviting glow with the warm cinematic look. The teal in the shadows keeps the image from feeling flat, while the warm highlights draw the eye to the subject. Apply the same grade across a travel series and your feed instantly looks like a curated film journal. Consistency is the key, so resist the urge to switch styles between posts in the same series, since a unified grade is what makes the whole set feel intentional and premium.
Protecting Skin Tones in a Warm Grade
The one risk with a warm grade is pushing skin too orange. To keep faces natural, ease the orange saturation slightly and lift the orange luminance so skin looks bright rather than muddy. Check the result on a real photo with a face before saving the preset, because landscapes can take more warmth than portraits can. A grade that flatters skin while still feeling cinematic is the sweet spot. Apply the finished look to AI portraits from my AI photo editing prompts for a consistent, premium result across your whole page.
Building a Consistent Warm Feed
The warm cinematic grade is most powerful when applied consistently. Use it across a series of posts so your feed reads as one curated film story rather than a mix of styles. Keep the exposure balanced between photos so bright and dark images sit comfortably together in the grid. A consistent warm tone quietly builds a recognisable identity, and viewers begin to associate that inviting golden look with your page, which encourages follows and repeat visits over time.
Frequently Asked Questions (FAQ)
What is a warm cinematic Lightroom preset DNG?
It is a DNG file that stores a warm film grade with golden highlights and teal shadows, which you copy and paste onto your photos in Lightroom mobile.
Is the warm cinematic preset free?
Yes. Free warm cinematic DNG presets work in the free Lightroom mobile app.
What content suits a warm cinematic grade?
Golden hour portraits, travel, couple reels, festival edits and lifestyle content suit a warm cinematic grade best.
Can I use it with AI photos?
Yes. Applying the warm grade to an AI portrait pushes the film tone and gives a consistent premium look.
Quick Recap for a Warm Cinematic Grade
For a rich warm result, balance golden highlights with teal shadows, fix the white balance, protect skin tones, and adjust exposure per photo. Save your version as a preset for a consistent feed, and apply it across a travel or festival series for a curated film look. Pair it with a VN cinematic code or slow motion template for a complete cinematic reel.
Final Thoughts
A warm cinematic Lightroom preset DNG gives your photos a rich, film like glow in one tap. Install Lightroom, import the DNG, and pair it with the prompts and templates across Editing By Vikas. New grades drop every week, so bookmark the Lightroom presets DNG hub.
